Serial Communication
In this lab, I started exploring serial communication between Arduino and the p5.js workspace. I learned how to send data back and forth between both platforms, and how to create artistic displays with p5.js. In order to correctly set up communications between the hardware of my computer/Arduino and the p5.js workspace, we had to download the p5.js serial control app. This allows for secure serial communication through the USB cable, as opposed to my web browser accessing my serial ports.
Arduino Side
For this section, I set up an Arduino circuit with two inputs: a potentiometer and a pressure sensor. My outputs were three LEDs, green, blue, and yellow. (LEDs pictured later in the write-up)
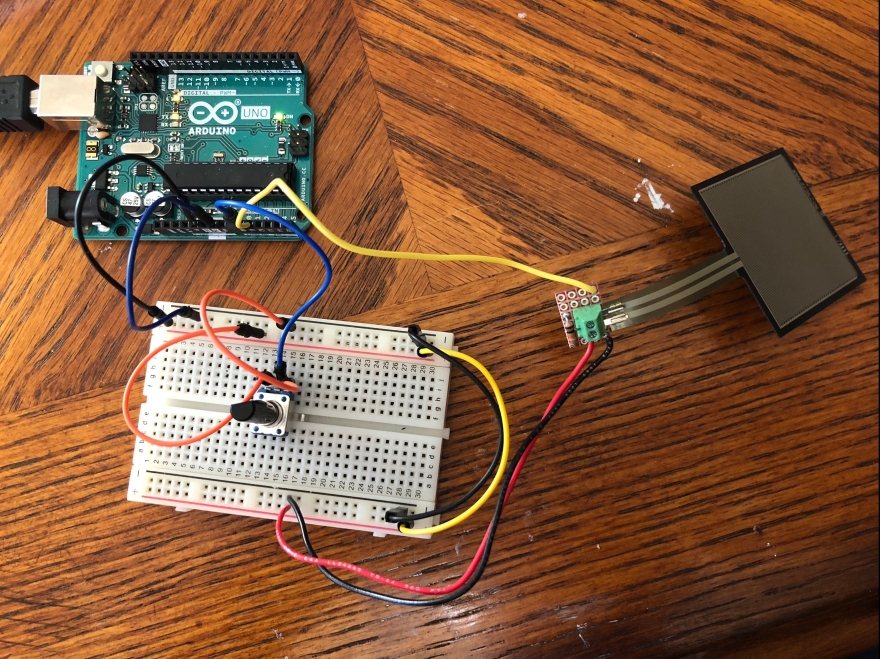
I checked my initial tests of serial communication by simply opening the serial monitor in Arduino, and confirming that my two sensors were reading in consistent values. The potentiometer has a range from 0 – 1023, and my pressure sensor was reading from 0 to about 1000. Before I moved onto my p5.js workspace, I formatted the data I was sending to be one line, parsed by a “,” and no spaces. This was important when reading the data into p5.js.
p5.js Side
Once I had my serial data correctly formatted when I sent it from my Arduino, I could begin to access it from my p5.js workspace. First, I wrote the sensor values that p5.js was receiving to the console log, just to check for consistency with the numbers. To do this, I had to make sure that my p5.js sketch was accessing the same port that my Arduino was sending sensor values through.
First p5.js Sketch
My first p5.js sketch was heavily based off of examples we saw in class, but it was a good start to seeing the possibilities of p5.js. I displayed an ellipse on my p5.js canvas, the width was being modified by the potentiometer value, and the height depended on pressure sensor values.
From p5.js to Arduino
Next, I sent serial data from p5.js to the Arduino. I turned on different colored LEDs based on which color rectangle was clicked on the p5.js canvas. In order to do this, I used the mouseReleased() function to send the location of the byte from p5.js to the Arduino. Based on the location, a specific LED was turned on. First, I made sure each LED’s circuit was closed before I incorporated any serial communication to the code’s output.
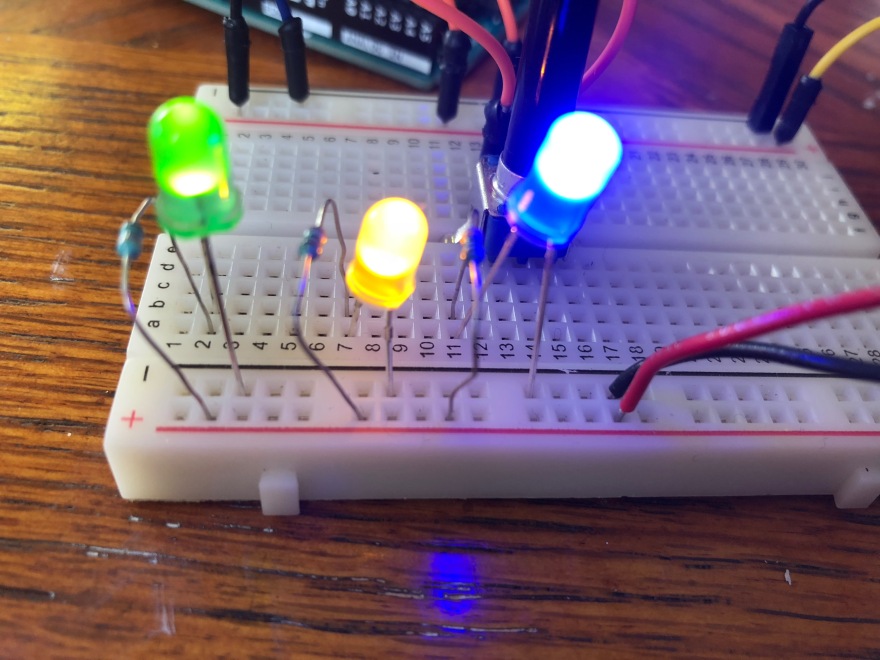
Notice the LEDs changing colors on my breadboard as I click different colored rectangles on the p5.js canvas.
Creative sketch From Arduino to p5.js
My first attempt to build off of the in class example did not turn out how I intended it to. I wanted it to be a relaxing canvas of bubbles bouncing off of the boundaries, however I got a little lost with trying to create an array of objects, and organize functions within that class of objects. I wanted the potentiometer to adjust the number of bubbles, and the pressure sensor to adjust the speed of the motion, but I quickly realized that was not feasible for me to accomplish for the lab. Since I am pretty new to p5.js I decided to simplify my end goal.
Here is my simplified version. The potentiometer changes the size of the bouncing ball, and applying force to the pressure sensor changes the redness of the canvas background. Although it is much simpler than my original idea, it is still calming and relaxing to watch and interact with.
Here is a link to my p5.js sketch, and my Arduino code is below! (Note: if you open my p5.js sketch when my Arduino is disconnected, my canvas will just look like a yellow square!)
This file contains hidden or bidirectional Unicode text that may be interpreted or compiled differently than what appears below. To review, open the file in an editor that reveals hidden Unicode characters.
Learn more about bidirectional Unicode characters
| int pot = 0; // potentiometer | |
| int push = 0; // presser sensor | |
| int incoming; // stores incoming data (clicks sent from p5) | |
| void setup() { | |
| Serial.begin(9600); | |
| pinMode(7, OUTPUT); // green LED | |
| pinMode(4, OUTPUT); // blue LED | |
| pinMode(2, OUTPUT); // yellow LED | |
| } | |
| void loop() { | |
| int potVal = analogRead(A0); // potentiometer pin | |
| int pushVal = analogRead(A1); // pressure sensor pin | |
| // min of pot = 0 , max of pot = 1023 | |
| // min of push = 0 , max of push = 990 about | |
| // initial testing of sensors | |
| // Serial.println(pushVal); | |
| // Serial.print("Potentiometer: "); | |
| // Serial.print(potVal); | |
| // Serial.print(" || Pressure: "); | |
| // Serial.println(pushVal); | |
| // BINARY: | |
| // send a single byte (range 0 – 255) | |
| // ASCII: larger messages | |
| // format it correctly so p5 can parse it correctly | |
| Serial.print(potVal); | |
| Serial.print(","); | |
| Serial.println(pushVal); | |
| // sending messages from p5 to arduino | |
| if(Serial.available() > 0){ | |
| incoming = Serial.read(); // store data onto incoming variable | |
| // light up green LED if top region is clicked | |
| if(incoming > 0 && incoming < 80){ | |
| digitalWrite(7, HIGH); | |
| digitalWrite(4, LOW); | |
| digitalWrite(2, LOW); | |
| } | |
| // light up blue LED if middle region is clicked | |
| if(incoming > 80 && incoming < 160){ | |
| digitalWrite(7, LOW); | |
| digitalWrite(4, HIGH); | |
| digitalWrite(2, LOW); | |
| } | |
| // light up yellow LED if bottom region is clicked | |
| if(incoming > 160 && incoming < 350){ | |
| digitalWrite(7, LOW); | |
| digitalWrite(4, LOW); | |
| digitalWrite(2, HIGH); | |
| } | |
| } | |
| } |
